

🦶 Part 1. How to Find Your Ideal Foot Position and Stance Width
The foundation of good squat form is finding the specific foot placement where your body moves most naturally. You can easily discover the perfect stance width and angle where your hips fold smoothly by following these five steps:
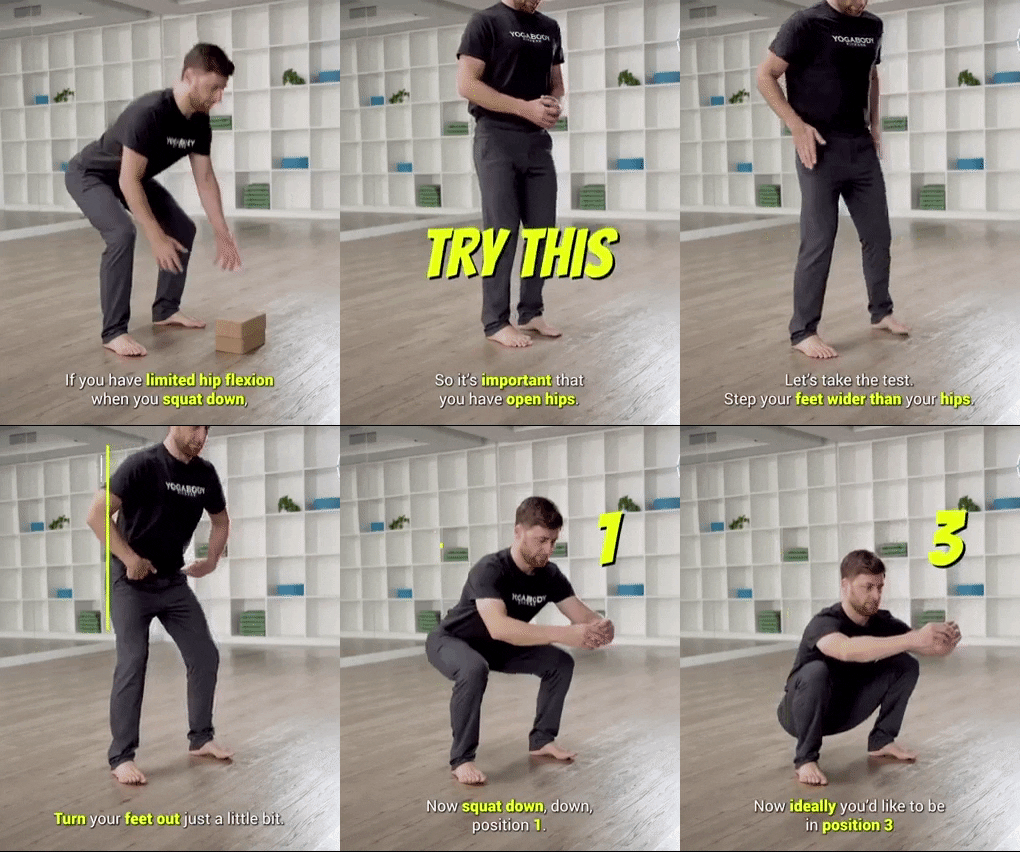
- Step 1. Quadruped Check: Get down on your hands and knees in a comfortable, relaxed tabletop position.
- Step 2. Adjust Knee Width: Gradually widen your knees slightly past hip-width to test different distances.
- Step 3. Rock Hips Backward: Keeping your upper body stable, slowly push your hips back toward your heels.
- Step 4. Find the Sweet Spot: Identify the exact knee width where you can sit back the deepest without your lower back rounding or your lower abdomen feeling pinched.
- Step 5. Stand Up and Apply: Stand up, keeping that exact knee width, and apply it directly to your standing stance. Generally, setting your feet around shoulder-width apart with your toes flared outward by 15 to 30 degrees yields the most comfortable and correct position.
🦵 Part 2. Squat Depth: How Deep Should You Go?

Once your feet are set, the next question is how low you should drop. The ideal squat depth isn’t determined by anyone else’s standards—it depends entirely on your hip mobility.
- Squat Only to the Point Before Your Back Rounds
Forcing yourself too deep can cause your pelvis to tuck under, a phenomenon known as a “Butt Wink.” This tilt forces your normally straight lower back to round out, which is the primary culprit behind post-workout lower back pain. To stay safe, only squat as deep as you can while keeping your spine and pelvis perfectly neutral in the mirror.
- Start with Thighs Parallel to the Floor
If you lack baseline flexibility, do not force yourself into a deep, ground-level squat. Stopping when the tops of your thighs are parallel to the floor provides more than enough stimulus for your quads and glutes. Once this depth feels completely stable and pain-free, you can gradually work on dropping lower.
💡 Part 3. Pro Tips for Solid Squat Execution
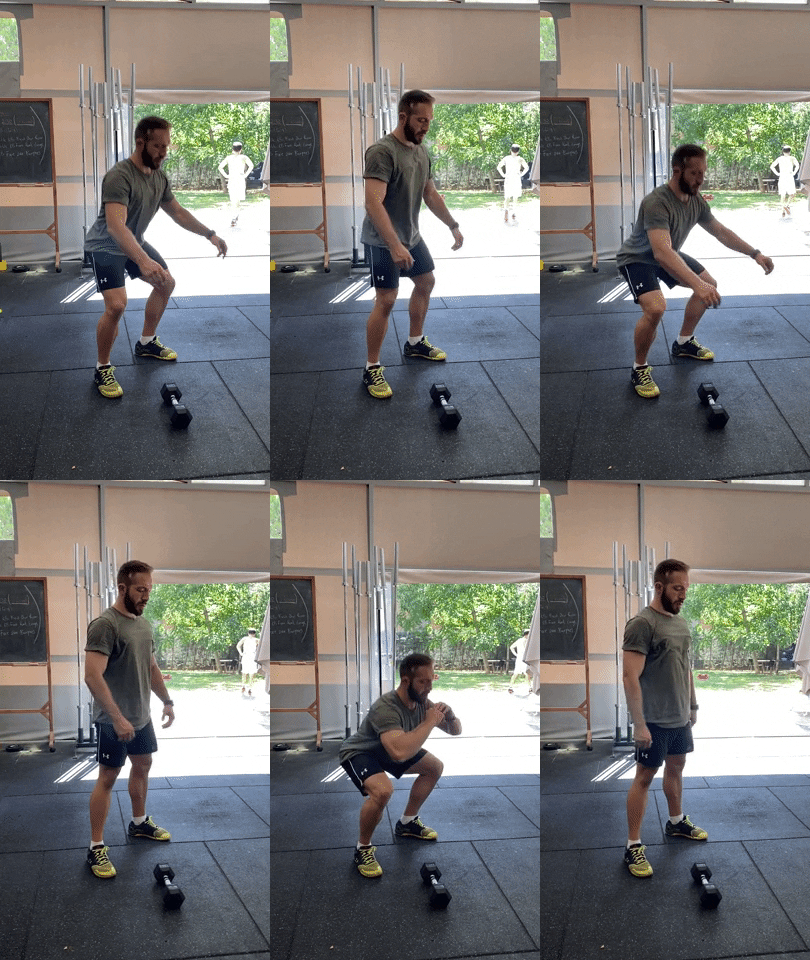
Even with the right stance and depth, you risk injury if your feet shift or wobble mid-rep. Use these real-world coaching cues to lock your lower body tightly to the floor and maintain solid squat form:
- Drive the Floor Apart Legally with Your Feet
: Letting your knees cave inward during a squat destroys your knee cartilage over time. As you move up and down, maintain the sensation of actively pushing the floor outward with the entire surface of your feet. This simple cue fires up your glutes instantly and stops your knees from collapsing. - Tripod Rooting: Grip the Floor with Your Toes
: Shifting your weight completely onto your heels or toes throws off your balance and strains your spine. Your big toe, pinky toe, and heel must act as a tripod, pressing firmly into the ground to ensure your lower body’s force transfers cleanly into your lift.
🔥 Part 4. Check and Track Your Form with BurnFit
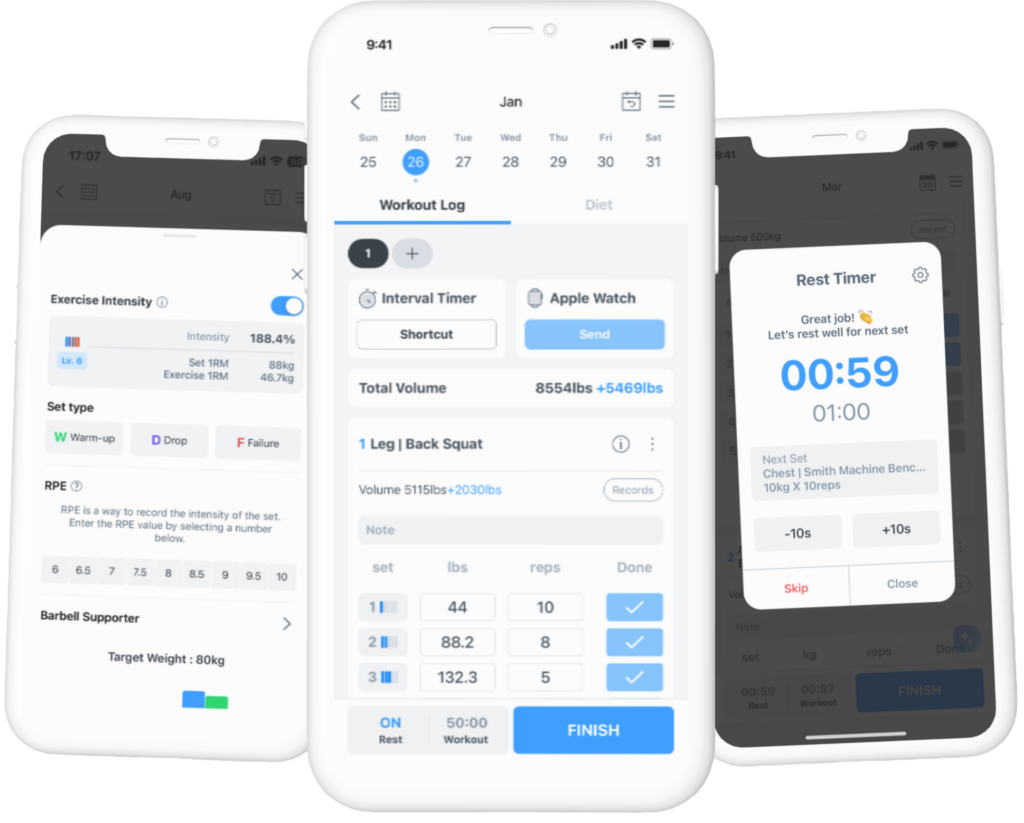
Finding your perfect squat form is a process of trial and error, adjusting your width and depth centimeter by centimeter. Using a workout log app like BurnFit allows you to safely track and zero in on your ideal stance without risking injury.
- Leave Detailed Setup Notes in Your Logs
: Log your squat weight in BurnFit and use the notes section to record how your body felt. Jotting down notes like “Tried a wider stance today with a 30-degree toe flare, zero knee pain!” or “Narrow stance hit my quads well but felt slight hip pinching” creates a feedback loop that helps you lock down your signature form quickly. - Monitor Performance Growth with BurnFit PRO
: When your squat form aligns perfectly with your anatomy, your overall performance will naturally improve. Checking your training volume charts on BurnFit PRO lets you verify at a glance that you are safely scaling your workouts over time without putting undue stress on your lower back or knees.


Seated Cable Row: 3 Tips for Better Form
Strength Training for Beginners: 5 Exercises, Benefits & Routine
Hevy vs BurnFit: Which Workout Tracking App Fits the Way You Train?
7 Key Lower Body Strength Exercises for Every Muscle Group
Glute Exercises: 3 Key Points for Building Toned Glutes
Thigh Muscle Exercises: 3 Key Points for Stronger Legs